In this guide, we’ll walk through how to make a knife from a rasp step-by-step.
I’ll use a recent best man’s knife project I completed for a local customer.

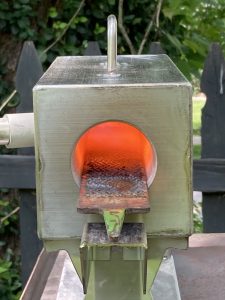
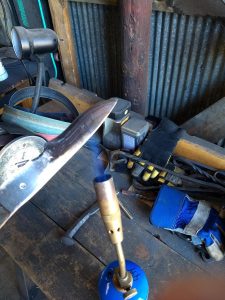
1. Anneal the Rasp
Rasps are hardened tools so they should be annealed (softened) first. This makes it easier to cut, grind, and shape them.
To anneal the rasp for this knife project, I used my small Atlas Knife and Tool single burner gas forge.
[Note: If you don’t have a forge, you can get the temperatures you need in a campfire. I’ll include details at the end of the article on how to do that.]
I got the rasp up to cherry red in color and non-magnetic and then shut off the forge with it still inside. This allowed it to anneal as it slowly cooled.
If you need to use your forge for another project, you can also anneal in the following substances:
- Wood ash
- Sand
- Perlite
- Vermiculite
The part of the rasp that you plan to turn into a knife should be fully submerged in the insulating substance.
Then you just leave it alone until it’s completely cool. This can take up to a few hours.
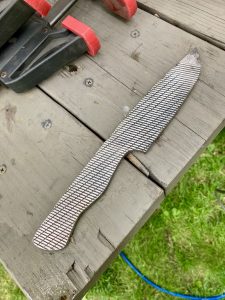
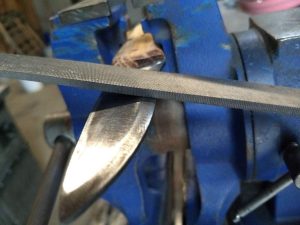
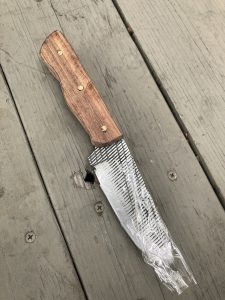
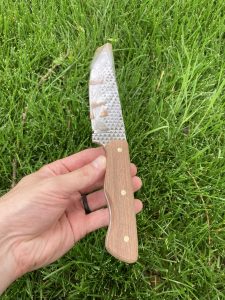
2. Smooth the Rasp and File Sides
Once the rasp is annealed, you can start smoothing out all the rough teeth on the rasp side as well as the file lines on the file side.
I prefer to use an angle grinder for this. I start with a standard coarse grinding wheel for the heavy work. Then I use a 60-grit flap disk to make it even smoother.
Here’s what the partially ground rasp looks like:

I wanted to grind down the rasp teeth while still leaving the textured design.
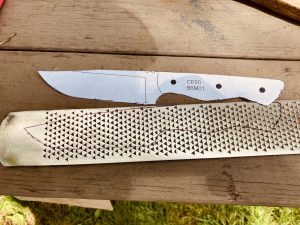
3. Trace a Template of the Knife Style You Want
Rasps are fairly thick and wide so you have a variety of options for knife styles.
My customer wanted a hunting style knife for his brother, so I found a good hunting knife template.
The best, free knife templates I’ve found were created by Dan Comeau. Mr. Comeau passed away in 2022, but Respite Engineering preserved his templates here:
DCKnives Templates at Respite Engineering
You can download the PDF and print out the style you want in a few sizes.
I chose template CP20 B6M01 and made some modifications to simplify grinding. I also wanted to keep more of the texture near the spine of the knife.
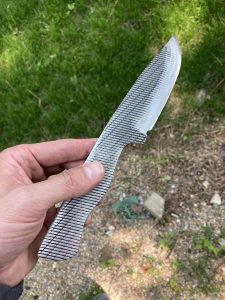
4. Cut Out the Profile of the Knife
For this part, I used an angle grinder with a cut-off wheel. I clamped the knife blank in the vice and cut away the steel outside my stencil lines.
I didn’t worry about getting right next to my lines since I needed to grind and file the final shape anyway.
This part of the process took about an hour.
5. Grind or File the Edge and Bevel
To make a knife from this rasp, it needed an edge. My stencil from earlier provided a guideline for where to set the top of the grind.
I started out with the angle grinder, but ended up using hand files for most of it.
I used a single-cut mill bastard file from Crescent-Nicholson to:
- Edge file
- Draw file
Edge filing set the angle using smooth, controlled movements. This is time consuming, but it’s inexpensive and it’s harder to make mistakes.
- If you used an angle grinder for everything, you might nick and gouge your work. This, in turn, makes it take longer as you smooth out those gouges.
Once the edge had even geometry on both sides, I used the single-cut file to draw file the flat of the blade. This smoothed things out and started to hone the edge.
I then used the following grits in order to achieve a satin finish on the rasp knife:
- 80 grit
- 120 grit
- 220 grit
Use a shop rag to wipe away the metal and sandpaper dust as it accumulates. That way it won’t scratch up the knife’s surface.
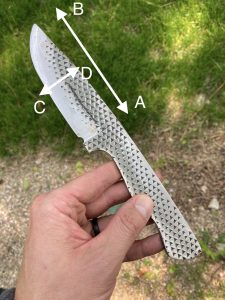
Tip: As you draw the file across the blade, change directions to get a smoother finish.
For example, if you start drawing/pulling from the handle towards the tip you should then alternate and pull from the spine to the edge.
Then you can move diagonally from the handle-spine side to the tip-blade edge.
Then return to pulling from the handle to the tip.
Here’s a photo marked with A to B and C to D showing the direction of movement:
If you have questions about this part, I’m happy to help via email: browncountyforge@gmail.com
6. Harden and Temper the Rasp Knife
Now that the knife blank is shaped, sharpened, and polished, we need to heat treat it. This has two steps and they’re both fairly simple:
Step One: Harden the Rasp Knife
Hardening knives can feel complicated the first few times you do it. Here’s a very simple way to harden a rasp knife:
- Heat the blade end until it’s cherry red in color. Carefully remove it from the forge with tongs and test the blade with a magnet. If it’s still magnetic, place it back in the forge until it loses magnetism.
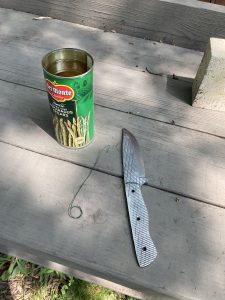
- Once it’s non-magnetic, quench it in oil for 8-10 seconds. I used a tall asparagus can with vegetable oil in it. This cost maybe $6 total for an effective quench tub.
- Set the blade on a brick, fire brick, concrete block or similar to cool. Make sure anyone who might be around knows that it’s hot. Safety first.
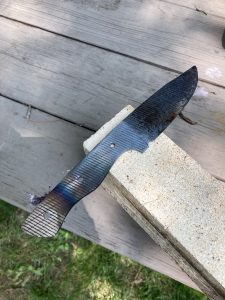
Step Two: Temper the Rasp Knife
After the hardened knife from a rasp has cooled, you will need to polish it again.
Following the same sanding technique we talked about earlier to smooth things back out and remove that darkened color.
When the blade is back to shiny and silver, you can temper it with two methods:
Tempering Method One: Toaster Oven
For this project, I used the toaster oven method. It’s simple and pretty close to foolproof.
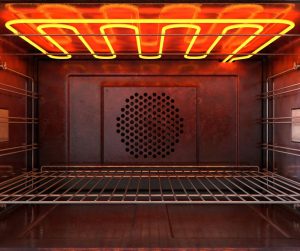
You’ll need an electric toaster oven that you don’t mind getting oily.
Turn it up to your desired temperature. In our case, that’s 425-degrees. This will give us a nice golden temper color.
That color is our clue that some of the stresses in the knife have been relieved.
*Hardening makes it hard, but also brittle. Tempering reduces that brittleness so it will hold up over time.
- Bake the knife for 1 hour at 425-degrees.
- Remove it and allow it to cool to room temperature.
- Repeat two more times.
Tempering Method Two: Propane Torch
This method is harder to control, but works well.
Using your propane torch, slowly move it along the spine of the knife.
Watching closely, you’ll start to see it turn a darker, golden color.
Once it reaches this golden color along the blade, remove the heat and set it aside to cool.
The final step in heat treating, is to polish out the temper color using a fine grit sand paper.
I like to wrap the sand paper around a flat file for leverage. I then push and pull lightly against the flat of the blade.
7. Handle the Rasp Knife with Wood and Pins of Your Choice
The customer chose rosewood for the handle. It has a beautiful, tight grain and sands to very smooth finish.
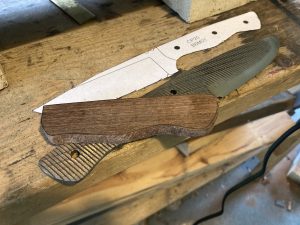
We’ll use the knife template one more time to trace the shape on to our wood blocks and line up the pin holes.
1. Cut Out the Handle Shape in Both Wood Blocks
No need to get super-close to the lines since we’ll be sanding the final shape.
I used a coping saw and a bench vise for this part.
2. Drill the Pin Holes in the Steel Tang
The tang of the knife didn’t get hardened so it’s soft enough to drill. I used a 3/16″ bit in a benchtop drill press to make the three holes.
3. Epoxy One Wood Scale to the Tang
I used JB Weld’s clear 2-part epoxy. Make sure you stir it together to get the best results.
We epoxy one side at a time when it comes to the handle. This allows us to line up the holes better.
Let it fully cure for at least an hour before drilling the holes.
4. Drill the Holes and Epoxy the Other Wood Scale
We used the pin holes in the steel as the guide for the drill bit.
Now we have holes through 2/3 of the piece. We let the epoxy cure on the second side before drilling out.
5. Set the Pins with Epoxy
The pins should be the same diameter as the holes you drilled. The epoxy should serve as a lubricant when you slide the pins through the wood, steel tang, and wood on the other side.
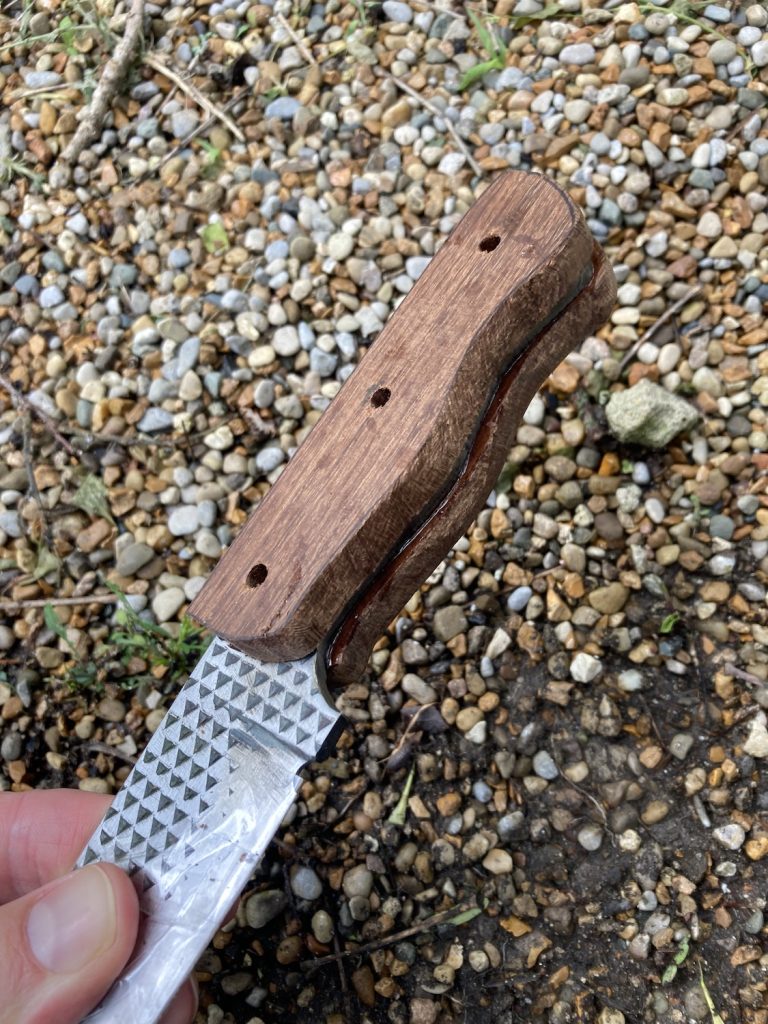
6. Sand the Handle and Pins to Final Shape
I used a MultiTool grinder attachment on my bench grinder with a 60-grit belt.
If you don’t have a belt grinder or bench grinder, you can use a wood rasp and sand paper to clean up the handle.
7. Seal the Handle
I used Howard’s Feed-N-Wax to seal the handle. I don’t like lacquered finishes on wooden handles. They lead to blisters and they can be slippery.
A beeswax and linseed oil-based wood conditioner leaves a much nicer feel on the handle.
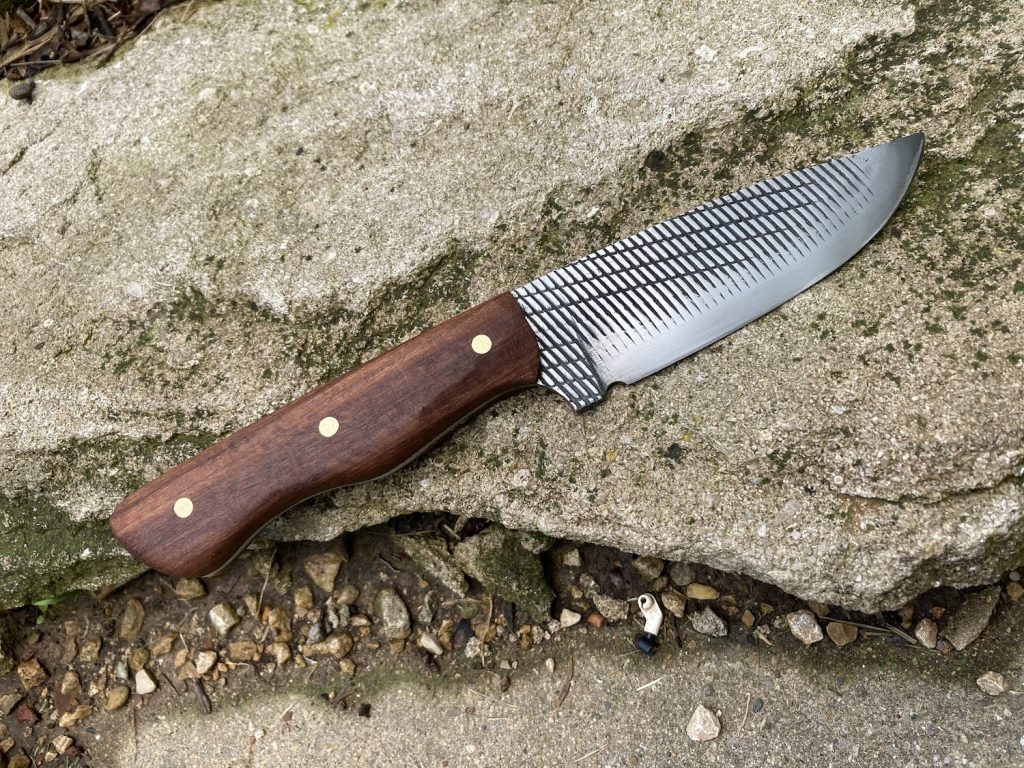
Conclusion: How to Make a Knife From a Rasp
As you can see, it’s a long process. But the results are satisfying and the customer was proud to give his brother the handmade gift.
In the following footnote, I’ll explain how to use a campfire for hardening steel. Here are some other next steps you can take:
- Learn how we make Serbian cleavers
- Learn how we make bushcraft knives
- Talk with us about a custom knife idea you have: browncountyforge@gmail.com
How to Harden Steel Using a Campfire
The key to hardening is getting the steel to the right temperature.
We don’t want it so hot that it starts to bubble and create scale.
We don’t want it so cold that it won’t harden properly.
So, how do we know the right temperature?
We look for a cherry red color – this is close to the color of coals in a campfire before you blow on them to make them glow orange.
We also test with a magnet for magnetism.
As long as the blade is nonmagnetic, we can quench it in oil.
To use a campfire for this, we just need to place the steel on the coals and watch it start to glow.
Once it reaches cherry red across the entire flat of the blade, we can use tongs to remove it from the coals and then test it with a magnet.