Heat treating your first knife can seem mysterious.
While there are a few things you want to watch out for, there is a set series of steps just like any other process.
In this section, we will cover How to Harden and Temper.
Hardening
Step 1: Critical Temperature
If you don’t get your steel hot enough or get it too hot, it won’t harden correctly.
So how do we know when it’s hot enough?
We focus on color first and then test it for magnetism.

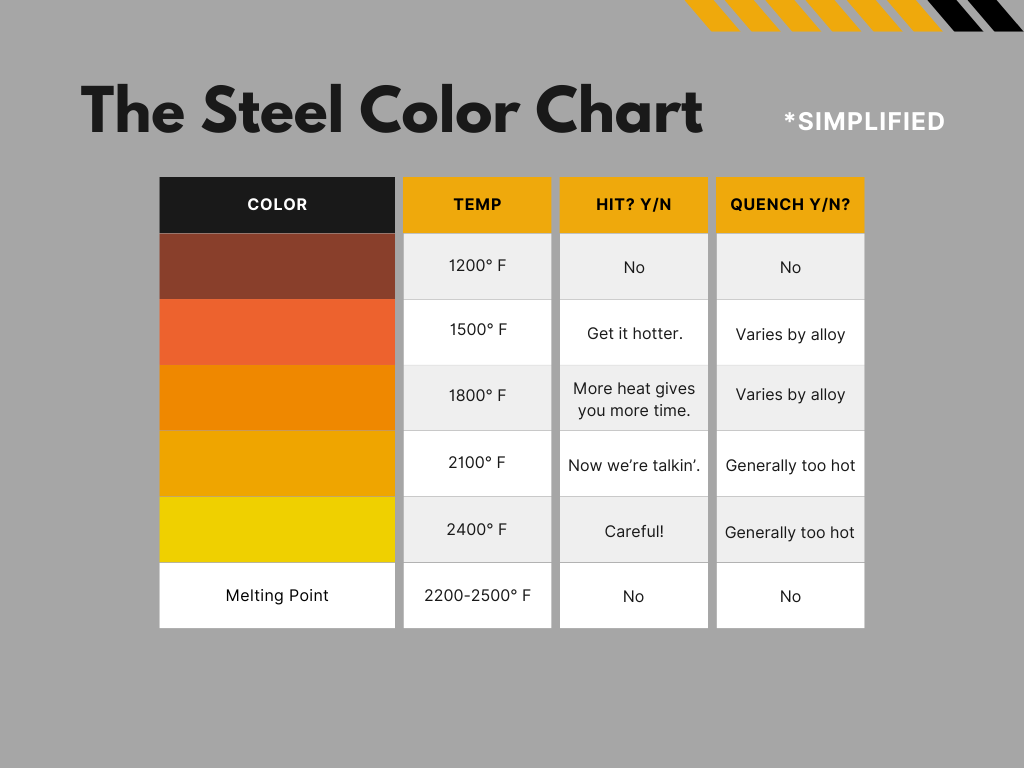
For 1084, we want the color to be a reddish-orange on the color scale.
This scale goes from cold steel (gray) all the way to white hot.
Before you get to white hot or even bright orange, you have to pass through cherry red and reddish-orange.
This is where our Hardening temperature lives.
In degrees, it’s somewhere between 1200° and 1600° F. The Steel Color Chart shows the colors we want in simplified terms.
Since we don’t have infrared temperatures gauges, we’re going to rely on a simpler method to know when we should quench.
Using Magnets to Test
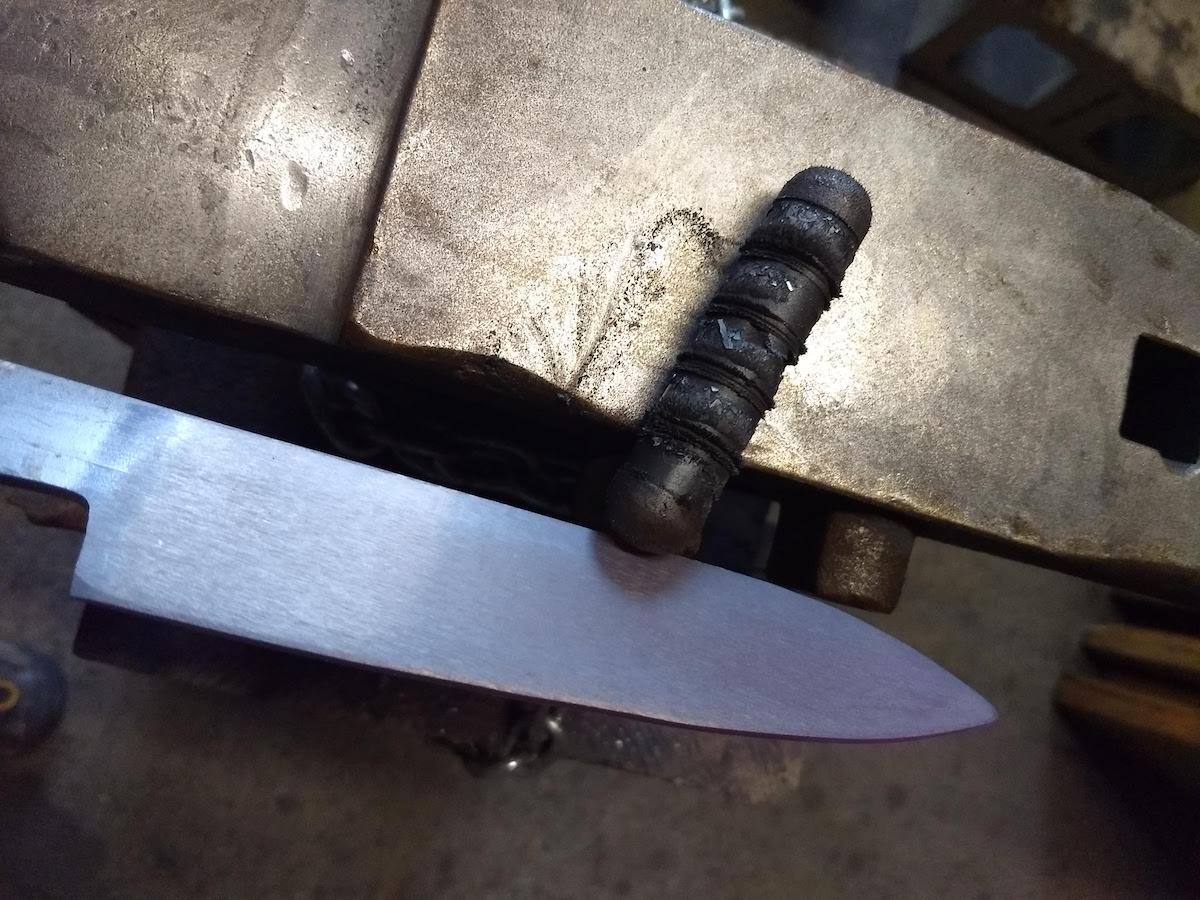
A simple way to know when your knife is ready to quench is to test it with a magnet.
In the photo below, you see a pill-shaped cow magnet next to a chef’s knife blank.
The steel of the chef’s knife is too cold and still magnetic.
We would not quench at this point.
Step 2: Quenching
When we can see that the knife is non-magnetic (no longer attractive), we reheat it slightly to compensate for any heat loss between our heat source and the quench tub.
We then take the knife out of the heat source and do an edge quench.
The edge quench involves submerging the knife’s edge, but not the spine or tang.
This is done by holding it at an angle with a pair of pliers or tongs.
The quenching oil should cover the entire blade edge from tip to bolster area (where your index finger will rest when it’s finished).
The next section will show the process and the angle of the quench.
The Quench Process
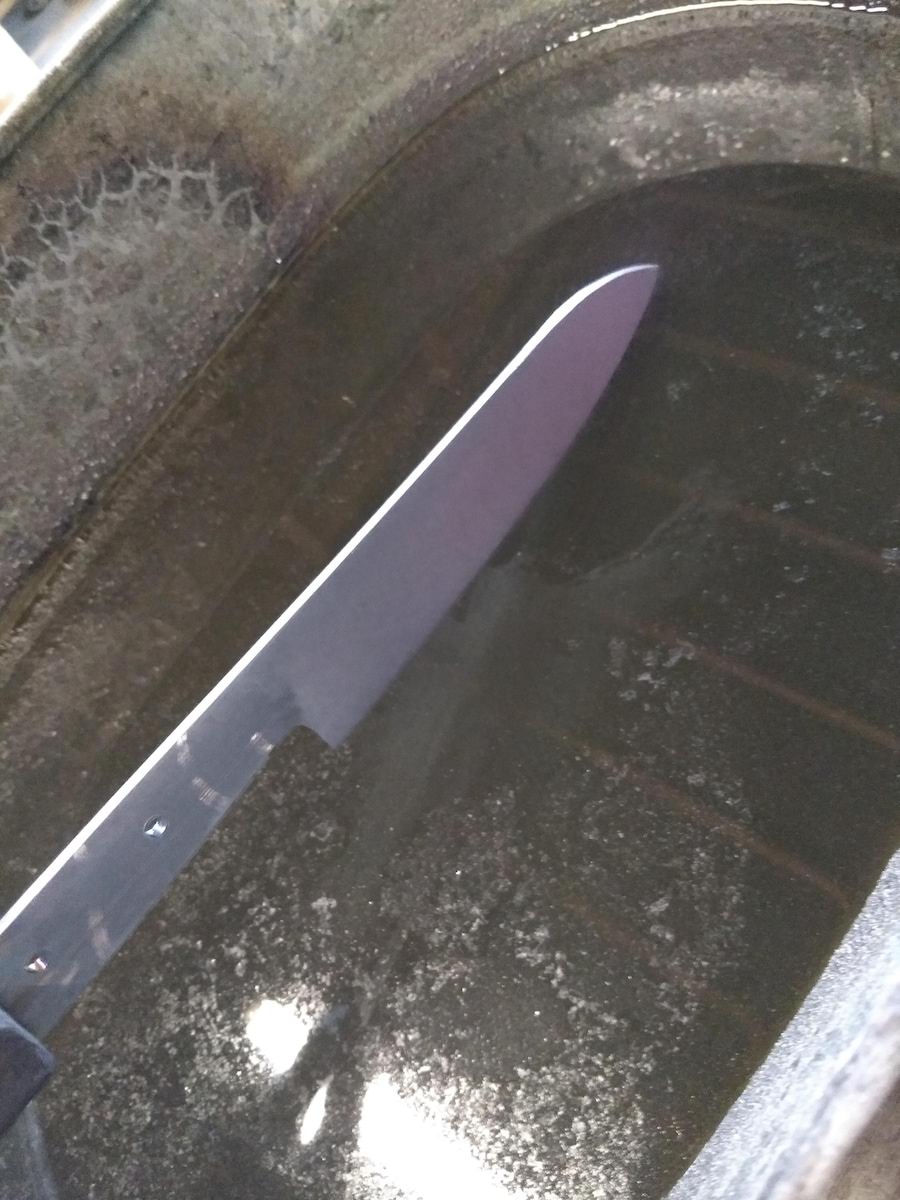
The 1084 knife blank is held at an angle over the quench tub filled with vegetable and canola oil.
For best results, the oil should be preheated to 100-120° F. You can achieve this by heating up a piece of steel and using it as a stir stick. If you have a deep frying thermometer (nice and long) you can test the temp of the oil to be sure.
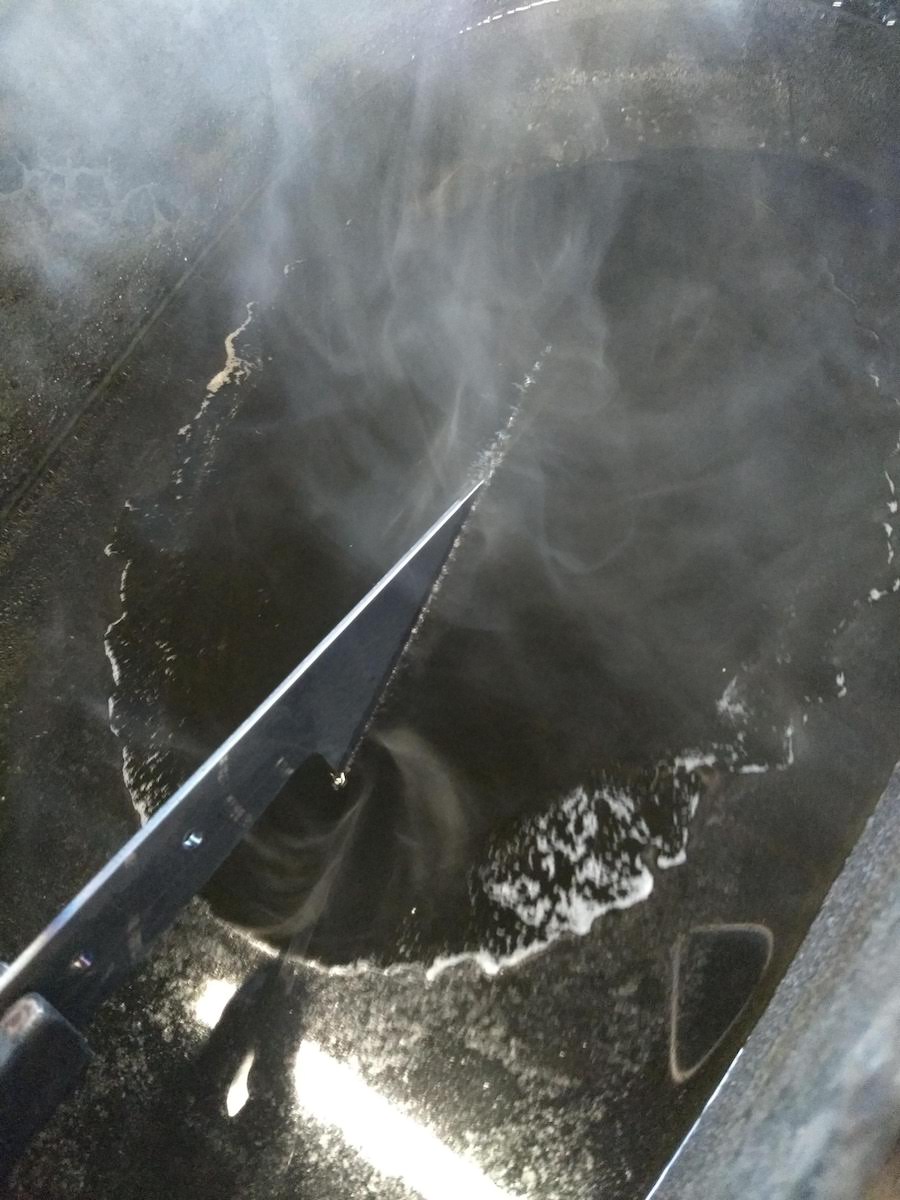
Then we submerge the edge in the oil, leaving the handle out. Gently moving the blade back and forth or in figure-eights prevents a vapor jacket from forming around the hot metal.
This vapor jacket keeps the oil from reaching the blade and will delay hardening. In some cases, it will keep it from hardening properly.
Move it gently through the oil for 10 seconds.
In the photo below, we see the angle we used and that we’ve covered the knife edge from finger groove to tip.

Quenching in Oil vs. Water
Oil allows for a slower, less aggressive quench. This makes cracks, chips, and fractures less likely.
Water quenching is very fast and must be done with care even with water-hardened steels.
Since we’re using 1084, an oil quench is what we want.
What kind of oil do we use?
I use a mixture of canola and vegetable oil for quenching 1084.
It’s inexpensive, doesn’t have the fumes of motor oil (a common quenchant), and it works well.
In my classes, I typically do an 8-10 second countdown while I gently move the knife back and forth through the oil.
I then remove it from the oil, carefully wipe off the excess oil, and set it aside on a concrete block to cool to room temperature.
Once your knife has cooled, it will be hardened.
How to test hardness with a hand file:
Take your fine hand file and push forward across the edge of the blade.
If you have properly hardened the knife, the file will not bite into the steel. It should “skate” across the edge leaving very few or no marks on it.
Next, we will go over Tempering. This is the process of removing some of the hardness from the steel so we can sharpen it over its lifetime.
Tempering Basics
Tempering is how we gain back the ability to file an edge and remove some of that hardened brittleness from the knife.
*You don’t have to temper a hardened blade, but it will make it more durable.
If you plan on sharpening it by hand in the future, you will want to temper it.
Rule of Thumb: Hardening makes it tough. Tempering makes it durable.
Here is a simplified Tempering temperature table and the corresponding Rockwell Hardness of a fully hardened blade.
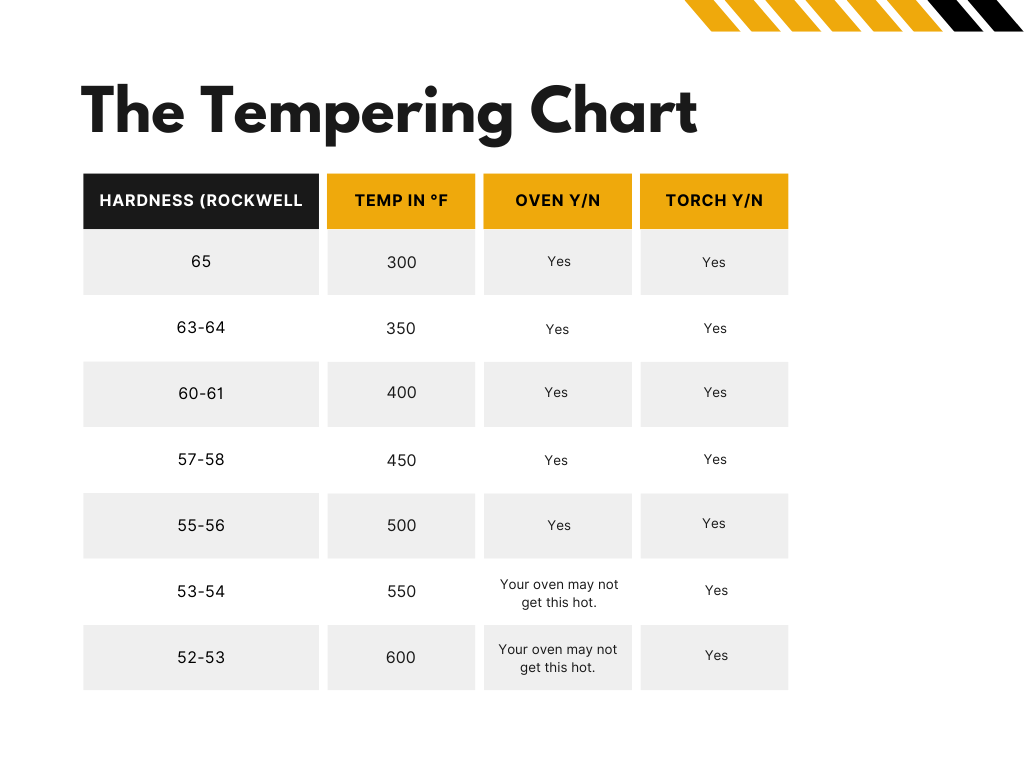
For the knives in this course, we will aim for between 400° and 450° F or a Rockwell Hardness of 57-61.
This temperature makes the knife “soft” enough to sharpen with a hand file, but not so soft that the edge will deform easily.
It’s also a temperature we can achieve with both a conventional oven and a propane torch.
We’ll go over this next.
How to Temper Your First Knife
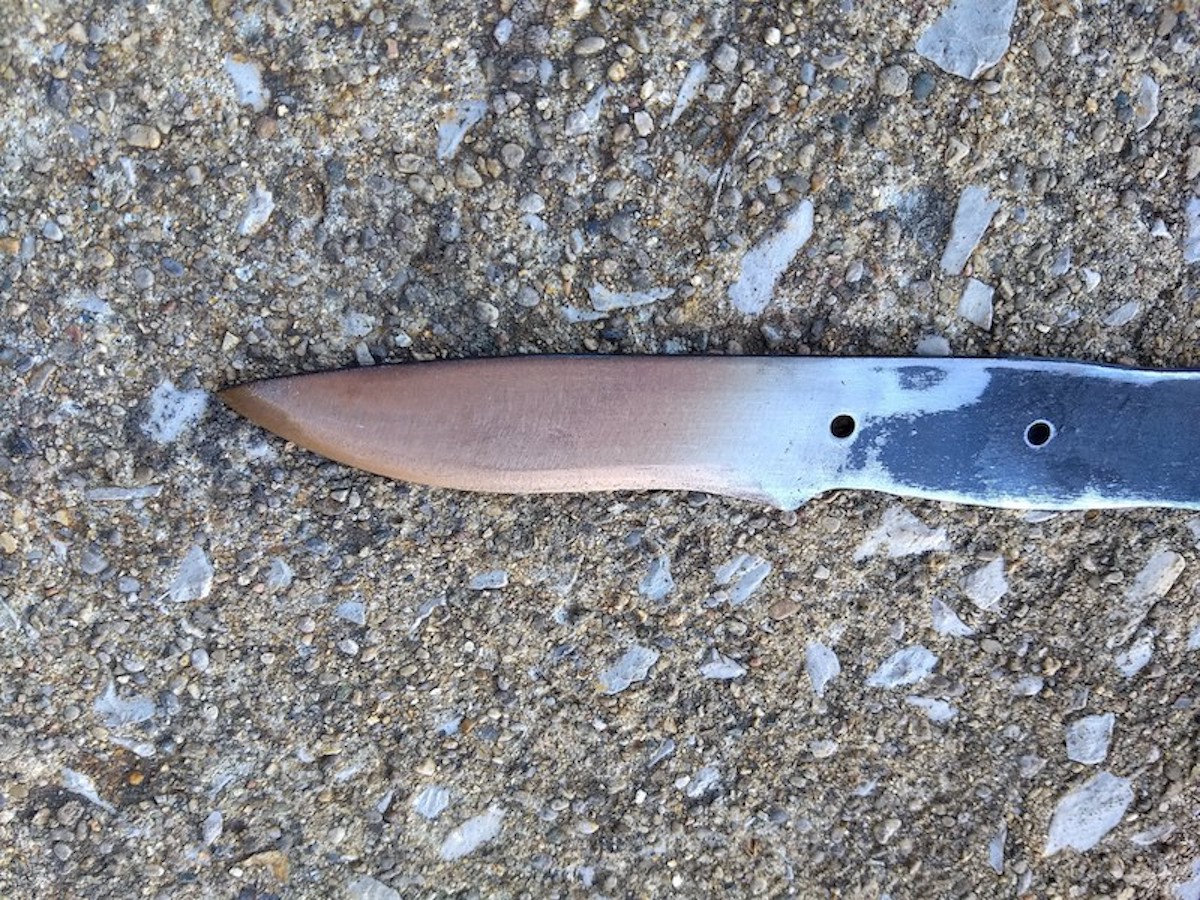
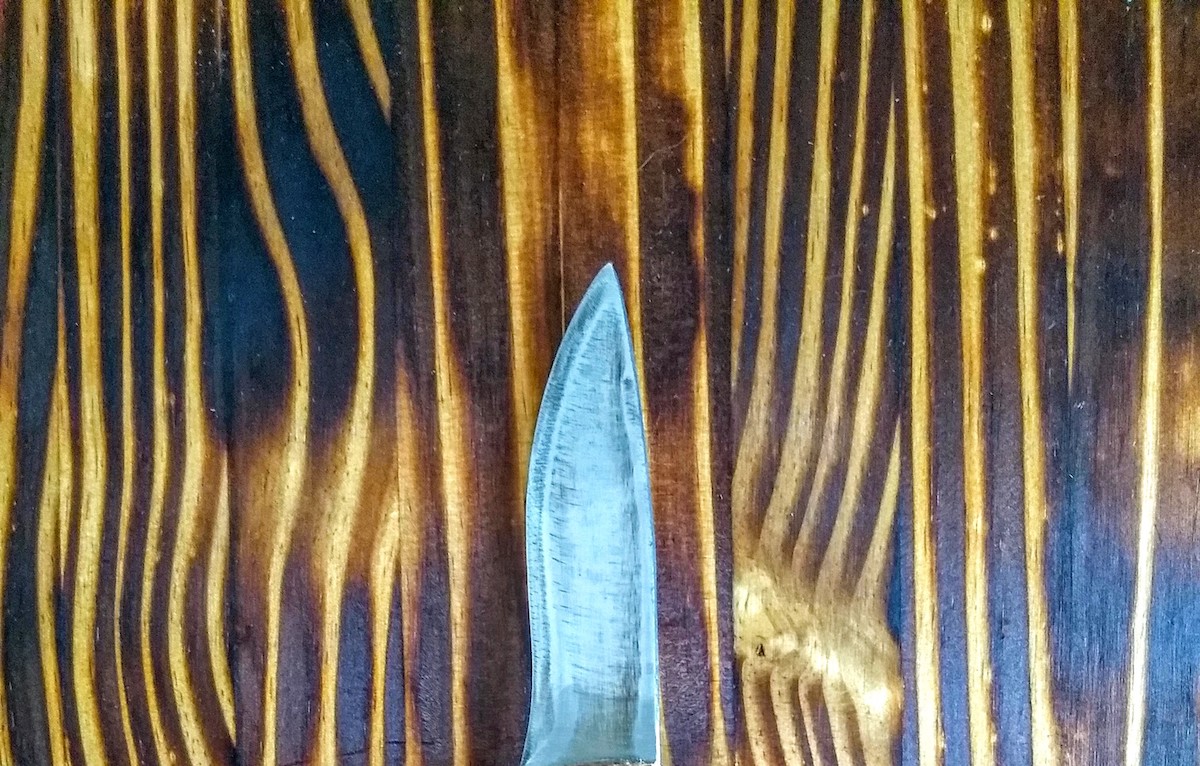
Before tempering, you will need to polish your knife blade back to shiny bare steel.
This is so we can see the necessary color changes.
If the knife is left in its darkened, quenched state, you will be flying blind.
Use sandpaper or a flap disk to remove the dark color from the knife.
There are two main ways I use to temper knives:
Method #1: Using a standard propane torch to do a soft back draw temper.
Method #2: Using an oven with a separate temperature gauge.
Method #1: The Soft Back Draw Temper Using a Torch
This is the trickier of the two methods and requires more attention.
The method is to gradually apply heat to the spine of the knife until you see a light golden color in the steel.
This color is at the low end of the temper color scale, roughly between 375° and 425° F.
If you want it to be “softer”, you would continue to heat it into the amber range – 460° F.
What makes this technique so tricky is that the torch tip focuses the heat in just one spot.

For best results, you should keep the torch flame moving across the metal while paying attention to the thinnest areas and the tip of the knife.
These thin areas will heat up faster than thick areas and can result in an uneven temper.
*We start heating from the spine first so we have plenty of time to see the color change happen before it reaches the blade edge.
When you reach your desired temper color set it aside in a safe area to cool.
Next we’ll look at Method #2: Oven Tempering.
Method #2: Oven Tempering
With this method you will be limited by the top end of your oven’s temperature.
This is usually 500° F which is more than adequate.
You will need a separate thermometer inside the oven to be sure you’re actually hitting the temp you want. (Oven temperatures fluctuate.)
*Don’t open the oven door during the temper cycle.
To play it very safe, plan to do 3 temper cycles of one hour to temper your knife.
To keep your knife in an upright and evenly heated position, cut slots into the sides of a disposable meatloaf pan.
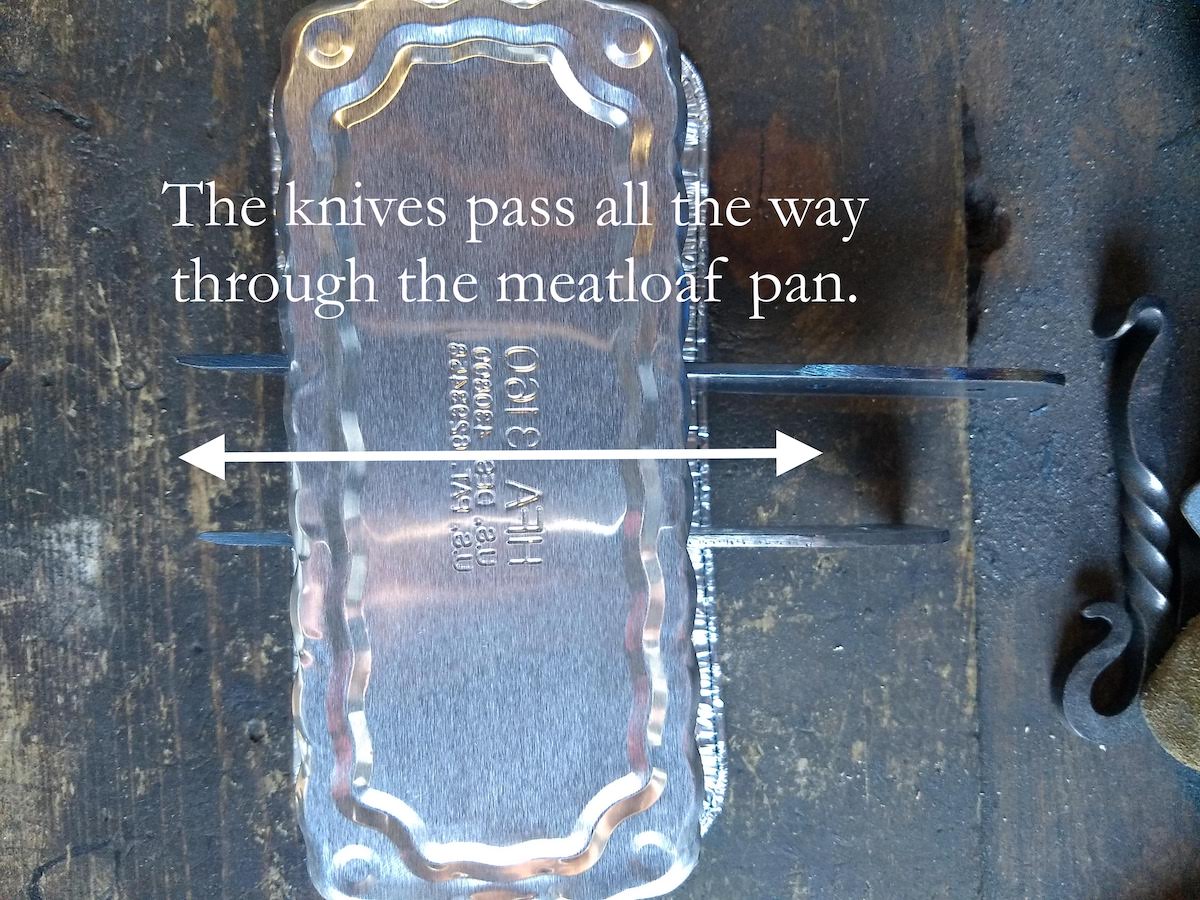
This knife will slide into these slots and sit upright in the oven.
This allows the heated air to circulate evenly around the knife.
*Note: This is optional. You can also temper your knife by laying it on its side on a baking sheet.
Oven Tempering Step-by-step:
- Preheat your oven to the Tempering degree range you want.
- Place your knife on a baking sheet or in its DIY meatloaf pan inside the fully preheated oven.
- Bake for 1 hour.
- Remove carefully and let it cool to room temperature. No quench needed.
- Bake for an additional hour.
- Remove and let cool.
- Repeat a third time if deemed necessary.
The repeated cycles are done to be sure that the knife is tempered all the way through.
Test the Temper:
To test your temper, use your round file and lightly slide it across the blade edge.
If it digs in, you have successfully removed enough of the hardness to make hand sharpening easy.
As you can see, one tempering method is much faster while the other will give you a more controlled, uniform result.
Both methods work!
Practice Each Method
I recommend trying both to see which gives you better results.
This will mean that you can sharpen it easily and it holds up to its intended use (chopping, slicing, piercing, etc.).
Next we’ll talk about Polishing Out Temper Colors.
Polishing Out Temper Colors
After you temper your knife, it will have a golden to amber color to it.
If you don’t like this look, it’s easy to polish it back out.
Using sandpaper grits from 220 to 600, polish out the color to leave the steel underneath.
This is a rougher polish than I would use on a chef’s knife, but it works great out in the woods.
In the next section, we’ll get to work on How to Make a Knife Handle for our first knife.
Go to: How to Make a Knife Handle