
Blacksmith Project Breakdown: Twisted Railroad Spike Knife
Students forge railroad spike knives in class every weekend at Brown County Forge.
From time to time they opt for the twisted handle look above.
In this post I’ll go through the steps it takes to forge a twisted railroad spike knife.
The Basic Steps:
- Forge the blade.
- Twist the handle.
- Clean up the knife profile and grind the rough bevel.
- Harden.
- Temper.
- Final polish and sharpen.
Step One: Forging the Railroad Spike Knife Blade
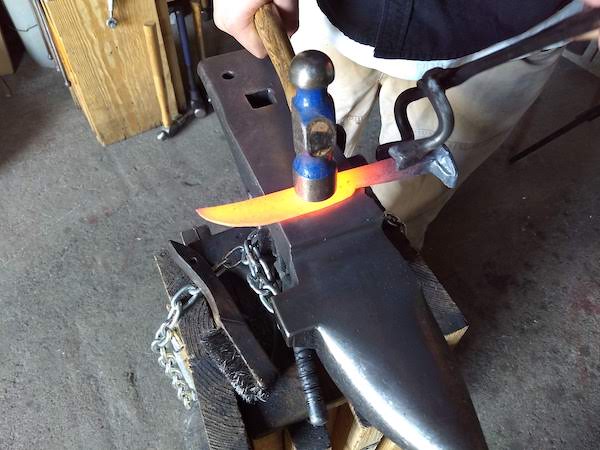
Get the railroad spike up to a nice glowing yellow-orange color.
Start hammering half way up the spike and out towards the tip.
By starting halfway up you’ll leave enough room for a handle and have plenty of material for your blade.
Depending on your hammering stamina and hand-eye coordination, this thinning process can take some time.
Usually it will take anywhere from 45 minutes to 2 hours for a beginner.
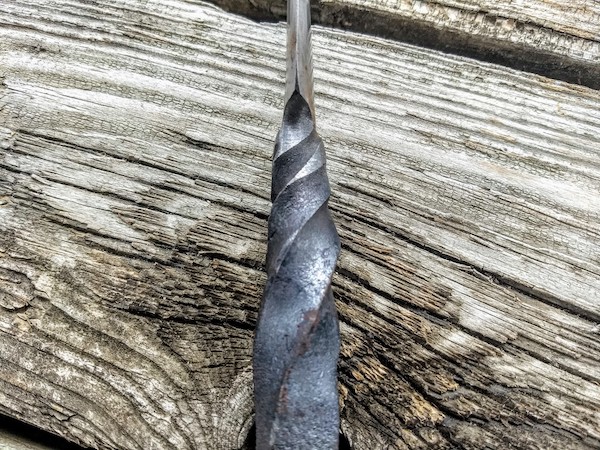
Step Two: Twist the Handle
Twists look great, but I’ll let you in on a secret:
They are one of the easiest techniques to do.
Due to the thickness of the material, we need to do one quarter-turn per heat for the railroad spike twist.
For each quarter-turn you will put the heated spike into your vise blade down.
You then grab just under the head of the spike with a pair of locking vise grips.
Keep the grips level and pull toward you for one quarter-turn.
Reheat and repeat.
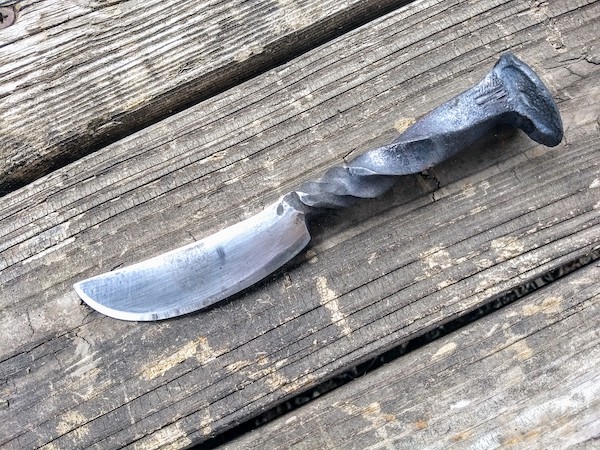
Step Three: Set Aside to Cool and Then Grind the Profile
Now that you have your basic knife shape forged and the twist made, set it aside to cool completely.
When it’s cool to the touch (about 20 minutes later), use a hand file, a bench grinder, or an angle grinder to clean up your rough edges.
You can also start cleaning up and polishing the flats of the blade.
As you do this you will see just how consistent your hammer blows were.
Your goal at this stage is to get smooth, clean lines and the final shape of the knife.
If you want a bowie railroad spike knife, you will grind in the bowie anatomy.
If you’re looking for more of a skinner, you will grind in skinner lines.
The grinder is your friend. =]
Step Four: Hardening
Now it’s time to reheat the knife to just above cherry red.
The reason this color is important is that it’s our visual signal that the knife is approaching non-magnetic.
We want it to lose its magnetism before we harden it.
This is an additional sign that the molecules in the metal are aligned properly for hardening.
(Want to see this in action? You can sign up for Online Classes here or take a class in person!)
When it’s hot enough and nonmagnetic, we quench it in oil for a count of eight seconds.
Then the knife is set aside to cool.
Side Note: We use vegetable oil as our quenchant in the shop. It does a great job and isn’t as toxic as burning motor oil.
Step Five: Temper
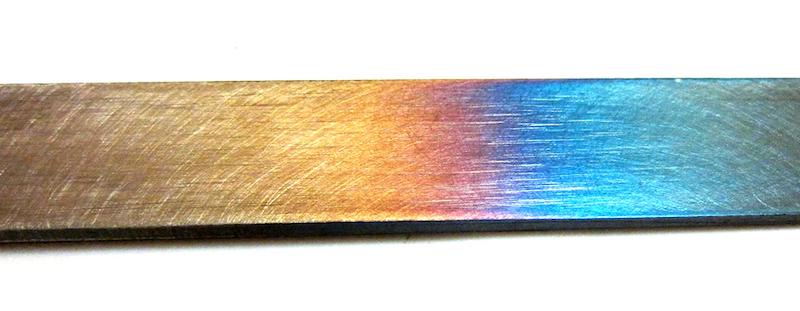
After cooling, the knife is ready for a polish to help the silver of the blade shine through.
This is necessary because we need to see the temper colors as we apply low level heat to the blade.
To temper we use a propane torch and apply heat to the spine of the knife.
Making steady passes across the spine, we gradually heat the blade up.
When it is a light straw color (the color all the way to the left in the photo above), we quench it once again in the vegetable oil.
(Click here for a full breakdown of tempering)
Step Six – Polish and Sharpen
You don’t have to leave the temper color on your blade.
When it’s completely cooled down, you can take a piece of sandpaper and sand it back to silver.
Some people like the “Man With the Golden Knife” look, but it’s up to you (bad James Bond reference).
Now it’s time to put the final edge on your twisted railroad spike knife.
I prefer to use a 10-inch Single Cut Hand File.
If you have experience using whetstones you should use what you’re comfortable with.
Proper sharpening with hand file involves these five things:
- Only file with forward motions. NEVER saw back and forth.
- Start with a steep angle to make your two bevel sides meet. Then go shallower for your final edge.
- If the file is screeching, adjust your file’s horizontal orientation.
- If you over-sharpen it’s not the end of the world. Knock the burr down with light strokes against the grain.
- Test carefully as you work. Don’t slide up and down the blade to test. Lightly pull across the blade edge to feel for sharpness.
If you’ve never done it before it will take some time to get good.
All of this is a patience game.
Thanks for Reading!