How to Make a Bushcraft Knife
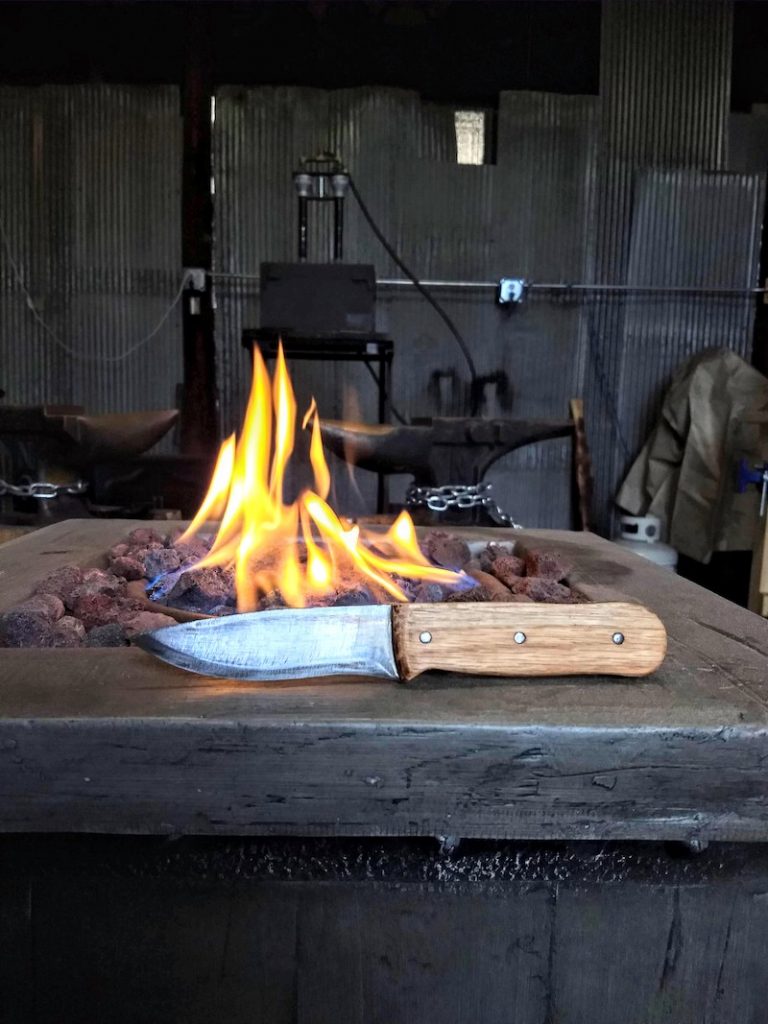
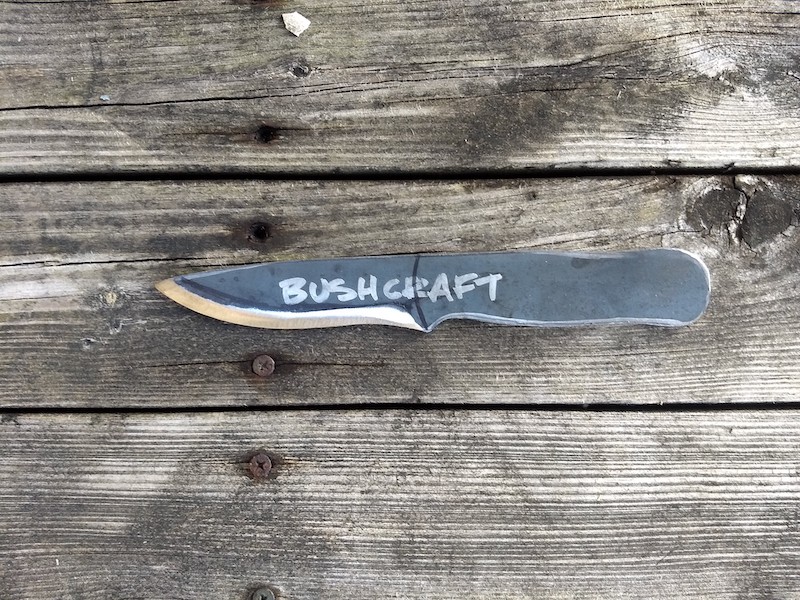
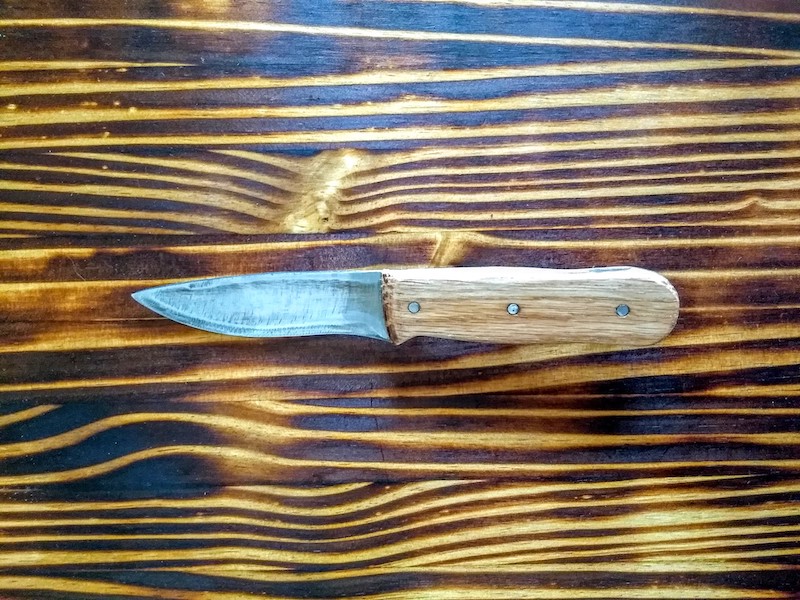
I made the knife in the above photo as I wrote DIY Knife Making – Bushcraft Knives.
The goal of the book is to simplify and clear up the steps of stock removal knife making.
There are some parts that might seem confusing or complicated. Heat treating is usually one of them.
In this guide, we will go through how to make a bushcraft knife from start to finish. Starting by selecting the right steel and moving through heat treatment and handling.
My name is Terran Marks, the blacksmith and owner of Brown County Forge.
Let’s get started!
Step One: Selecting the Right Steel
To get the best results, we will want to start with a suitable steel.
Steel with carbon content under 0.30% need not apply. Any steel under that percentage won’t heat treat properly.
You also don’t want steel that is Ultra-High Carbon. It’s great for knives, but it can be difficult to work.
It’s not a steel group for beginners.
For the knife in the book, I used 1084 cold finished steel. It has 0.90% carbon putting it at the top of the High-carbon Steel range.
Step Two: Gathering Knife Making Tools
Contrary to popular belief, you don’t need expensive tools to make knives.
You don’t even need a forge or anvil. (Sadly, since working with both is a lot of fun.)
For this how-to we will focus on common items that are easy to get and that you might already have.
Knife Making Tools:
- Something to cut steel
- Something to shape steel
- A heat source for hardening (this can be as simple as your wood stove or campfire)
- An oven or hand torch for tempering
- A quench container
- Safety gear (Eye and hearing protection)
- Hand files
- Rasp and coping saw
- Epoxy for attaching handles
- Clamps
Some of the items listed above are fairly broad. “Something to cut steel” could be a hacksaw or an angle grinder with a cut-off wheel.
It comes down to what you already have or what you want to spend money on.
My general rule when it comes to tools is:
If it saves me a lot of time, I’ll buy it. Especially if the price tag is a small multiple of my hourly rate.
For example, if a $59 angle grinder can speed up my production time by 3 hours. And my hourly rate is $25, then it makes sense for me to buy the grinder.
Step Three: Cutting, Grinding, and Shaping
The shaping of your bushcraft knife comes down to a few things:
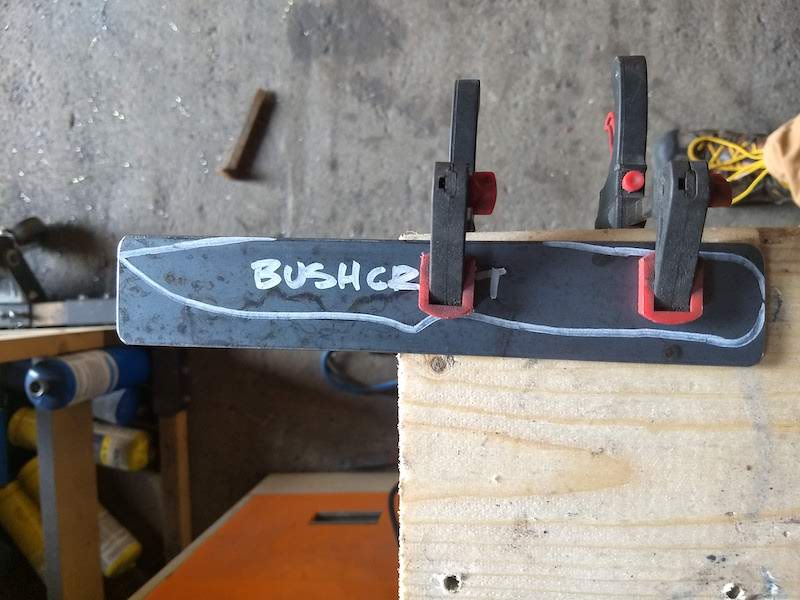
- Having it securely clamped – Either with hand clamps or in a bench vise.
- Following a template – These can be found by doing an internet search or in DIY Knife Making – Bushcraft Knives (Instant PDF download)
- Exercising patience – If you go too fast, you can make mistakes. If you use a hacksaw, it can be frustratingly slow.
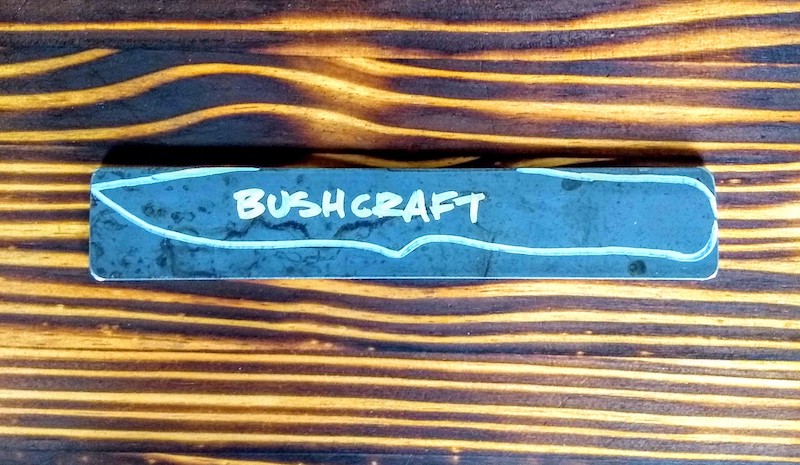
When I cut out the shape of the knife, I left a bit of material outside the lines.
This ensures that I don’t take too much. I can always grind it away later.
Once I have the basic shape cut out, I either use hand files or a bench grinder to tighten up my profile.
You can also use an angle grinder with a flap disk for this. (Flap disks are great for polishing and shaping steel. They’re less aggressive that the standard angle grinder wheel.)
Put the Bevel on Your Knife
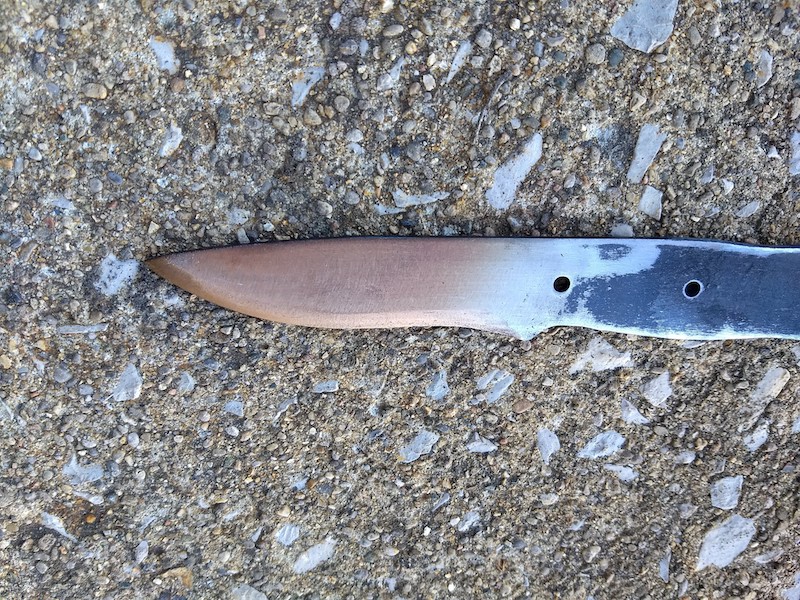
The proper bevel for a bushcraft knife is the Scandinavian grind.
It’s a short, fairly steep bevel that is meant to cut well, but also hold up well under heavy use.
You can compare the uses of a Chef’s Knife and this knife to get a feeling for grinds:
- Chef Knife – Full flat grind. This is great for slicing, piercing, disjointing, and all of the other chef tasks. However, by grinding from the spine all the way to the edge makes it very thin. This makes it less suitable for heavy outdoor work.
- Bush Knife – Scandinavian grind. Also good for cutting and piercing, but has more “meat” left so it holds up to heavy work.
Here is the Scandinavian grind on our knife:
You’ll notice that the grind is only 1/4-inch wide from knife point to where it will almost meet the handle.
The angle is approximately 20-degrees on both sides, meeting in the middle of the knife edge.
To achieve this, you can use either the flap disk mentioned above or a Fine Metal File (also called a Mill Bastard).
This takes patience as well to get it right so take your time.
Mark and Drill Your Pin Holes (if desired)
Since we’re using very strong epoxy to put the handle on later, we don’t need pin holes.
But if you’d like them and you have access to a drill press or hand drill, here is how I do it:
- Mark 1/2-inch in from either end and then split the difference for a total of three holes.
- Use a center punch to mark and indent these points.
- Drill through using a 3/16-inch bit. This is the same size your pin stock will be.
Step Four: Heat Treating
Once your knife is all shaped up and your grind is set, it’s time to heat treat.
There are two components of heat treating:
- Hardening first.
- Tempering second.
You harden a knife to strengthen it. You temper it to make it durable.
Think of hardening as making it tough, but brittle.
Tempering takes some of that brittleness back out of the blade. This makes it so it will hold up to things like splitting kindling.
How to Heat Treat a Bushcraft Knife:
Hardening
Using your heat source, you will get the blade up to a bright reddish orange color. Somewhere in the neighborhood of 1200 degrees for 1084 steel, but not more than 1500 degrees.
If you have a magnet handy (even a fridge magnet will do), you can test the steel for magnetism.
This is an old blacksmith trick to see if the steel is ready for quenching.
If it does not attract the magnet, it’s ready.
Put it back in your fire for a few more seconds to account for heat loss on your way to the quench container.
Quench it in your tub full of oil for 8 seconds. I use a mixture of vegetable and canola oil for my quenchant.
I don’t recommend motor oil due to the health hazards and fumes.
After you quench, set the blade on a non-combustible surface where people won’t mistakenly pick it up.
Tempering
When it is completely cool to the touch (15-20 minutes later), you will polish it to a shiny silver.
This is so we can see the temper colors come through.
In tempering we rely on steel color to tell us when we have hit the right temperature.
You can see the proper temper color in the photo above. This is right at 450 degrees or amber in color.
To get this temper, you can use a propane torch to gradually heat up the polished steel.
As it gains temperature, you will notice that it takes on a light golden color.
Pay attention here because we are getting close to the right color.
Once it hits that amber color, we will quench it again in our tub of oil.
Set it aside to cool.
Step Five: Handling Your Knife
Now that your knife is heat treated, it’s time to put a handle on it.
I like to stick to local wood types most of the time.
There are great manmade materials and composites out there, but I prefer the old-fashioned way.
I chose Oak for this knife. It’s readily available at the local hardware store and it’s inexpensive.
Steps for Handling a Knife:
- Trace your knife blank on to your two pieces of wood.
- Using a coping saw, cut out the rough shape of the handle.
- Next, use a rasp to get the curves and contours right.
- Finish the handle scales with finer and finer grits of sandpaper.
- Add epoxy (Gorilla Glue clear is great) to one knife scale and clamp your knife to it.
- Let it set at least 2 hours.
- Drill through the pin holes you set (if you did) in the steel to make the holes in the wood.
- Repeat for the other side.
- Shape to your desired feel.
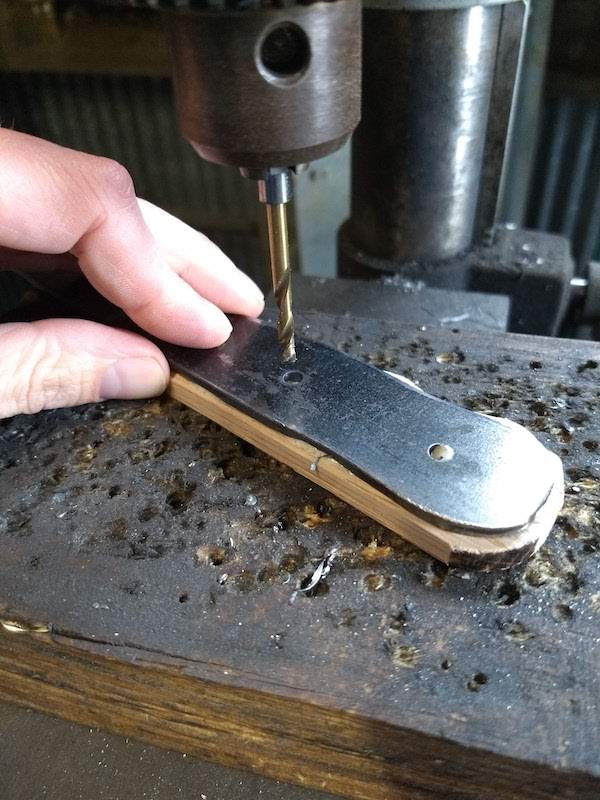
Drilling the pin holes. You can see the bit of epoxy that expanded into the back hole.
This is fine since it can be drilled out and cleaned up.
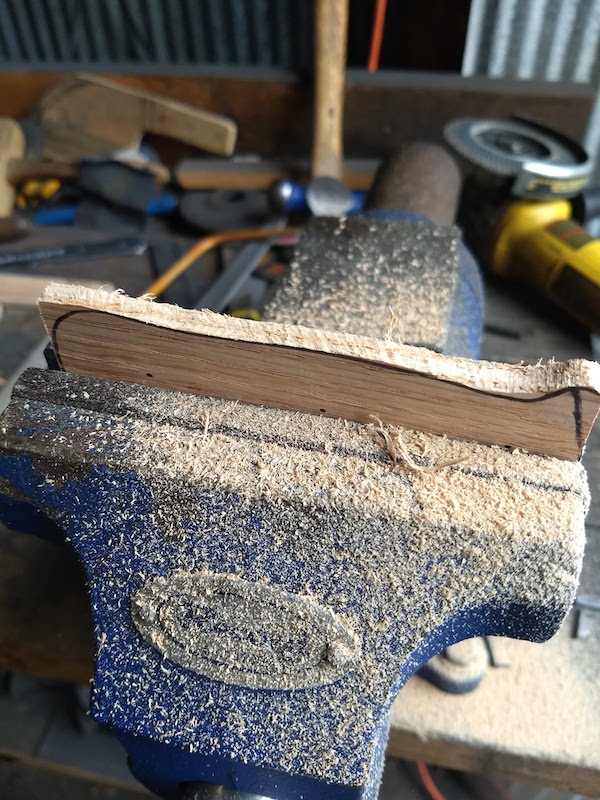
The results of working with the wood rasp. You can see it’s as simple as following the traced lines you made.
After you’ve shaped up your handle, you can seal it with stains and lacquer or leave it more natural.
I tend to stick with natural, beeswax-based finishes.
So for this knife, I used a beeswax and orange oil wood conditioner to seal the handle:
And now your bushcraft knife is ready for use!
Want to Learn All the Nitty-Gritty Details?
This post should get you started on the process of making your own knife.
If you would like step-by-step instructions in a Full Color book you can hold in your hands, I wrote DIY Knife Making – Bushcraft Knives for you.
Learn how to:
- Select the right steel and judge carbon content.
- Use a template to create your own custom knife.
- Make knives with all of the guesswork taken out of it.
The eBook is available here. (Save 64%)